Sass: Syntactically Awesome Style Sheets is the most mature, stable, and powerful professional grade CSS extension language in the world. 1. Steps to use sass in Native html Install sass globally by npm Create separate folders to put .scss and .css files Watch .scss files and compile them to .css real-time Monitor and sync compile single .scss file Monitor and sync compile .scss file to .css in its own directory Or use an extention in VsCode to compile: live-sass-compiler: Compile Sass or Scss to CSS at realtime with live browser reload. easy-sass: Built-in, easy to use Sass compiler Link the .css file in the header of html document: 2. Steps to use sass in React Install node-sass as dependency for React Change file extension .css to .scss Import the .scss files in React component: or read the React official tutorial here 3. Steps to use sass in Vue.js Install npm packages as development dependency: or setup to use them when creating Vue app via vue-cli scaffold tool. You can pick a preset manually and choose a CSS Preprocessor tool while running the vue-cli scalffold. If you choose SASS/SCSS, node-sass and sass-loader will be installed automatically when the project is created. Add lang="scss" in the style tag of the Vue component:
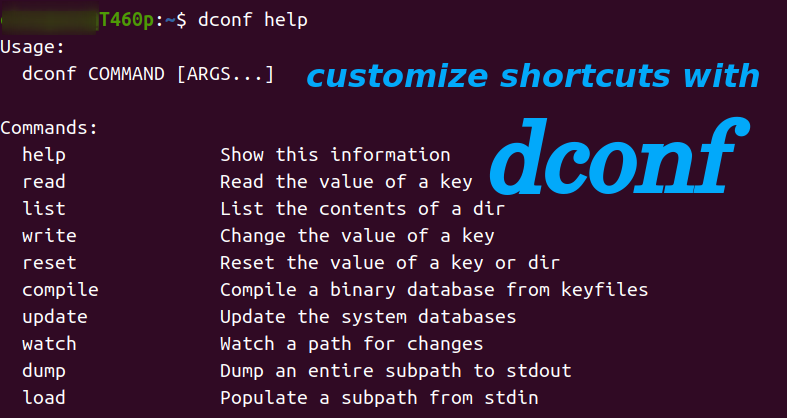
From the previous article, we know it's feasible to add our custom shortcuts via Gnome Control Center or using gsettings commands in script to change key values in dconf database schemas. After knowing more about dconf database configuration system and its cli tool, I figure out another handier way to manage custom shortcuts. All we need to do is to define the shortcuts in two files and then load it by dconf commands. Principles(dconf database and commands) dconf database schema and keys As we kown from the previous article, creating custom shortcuts keybindings is actually related to keys operation in two dconf schemas: 1. in the relocatable schema org.gnome.settings-daemon.plugins.media-keys.custom-keybinding, set three keys(name, command, binding) in the specific custom shortcut sub-folder path; 2. in schema org.gnome.settings-daemon.plugins.media-keys, update key custom-keybindings to generate new sub-folders for created custom shortcuts. With the help of dconf commands, we can read, write schema keys, or we can export(dump) keys to a file, import(load) keys from a file via shell redirection operation. dconf commands basic By knowing the principles, we will introduce how to manage custom shortcuts keybindings via two simple transition files instead of operating keys in dconf schemas directly. This method brings more convenience, we can: - edit multiple keybindings in plain text files - backup and restore shortcut keybindings definitions from files - avoid long path strings when operating relocate schema keys Files needed File 1: custom shortcuts keybindings dconf template This template file contains one custom shortcut: press F1 to call screenshot application flameshot, and it's the first custom shortcut keybinding. We can…
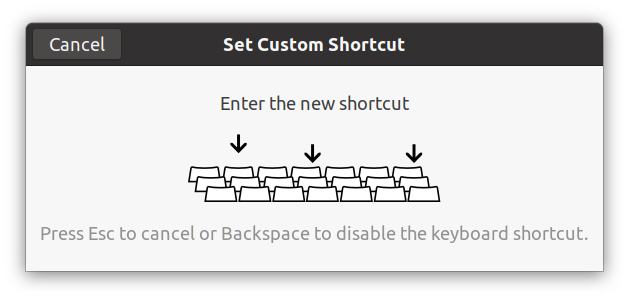
Remider: I found another handier way to manage multiple custom shortcuts after this article was written and I put it here: manage shortcuts keybindings via files and dconf commands. Create new custom key bindings via Gnome Ctronl Cetner Key bindings can be customized using the Gnome Control Center. It can be found as "System Settings" in the menu or accessed on the command line using gnome-control-center. All the key bindings are in the Keyboard Shortcuts section, and the Custom Shortcuts is the last category at the bottom. You can change the default key bindings from other categories, but you cannot remove or disable them here; You can add, remove or modify your own key bindings for applications in Custom Shortcuts category. However, the new custom key bindings cannot override the already defined keybindings in other categories. For example, if you want to set up another shortcut to do screenshot via Print key, that's not applicable here, as this shortcut is aready defined in the Screenshots category and the key is not released. To create your own application keyboard shortcut in the Keyboard Shortcut panel: Click the + button(in previous image). The Add Custom Shortcut window will appear: Type a Name to identify the shortcut, and a Command to run an application. Click the Set Shortcut .... When the Set Custom Shortcut window opens, hold down the desired shortcut key combination. Click Add. Note: The command should work properly in your terminal otherwise your shortcut will not work. So you have to test it before you put it there. Ubuntu Gnome…
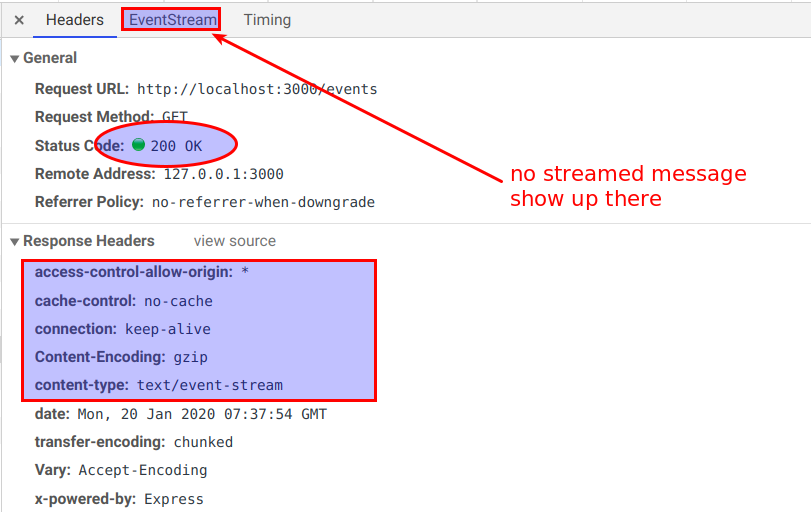
Issue and phenomenon When I use server sent events to the react client: the event messages can be received when I access the backend by request url directly from the browser address bar, but can never be received by the front end application, and the EventStream in Chrome Dev-Tool is empty; However, once I stop the backend server, ALL the messages are flushed/sent to the client at one time. It seems that the messageS are buffered or pended somewhere. The node.js/express test code: The client javascript: Analysis I have already enabled CORS by using cors middleware at the backend; The proxy works fine, as the other requests to the endpoints are avalaible; The Cache Control option settings of the response HTTP header of server-side are exactly the same with the sample code of MDN docs and it looks right. I didn't get an answer from others or google sse, eventSource, cors or proxy. One suggested way is to disable CORS of browser: $ google-chrome --disable-web-security But I don't think this is a good way as we need to put things online eventually, it didn't work for debugging as well when I tried. Solutions This bugged me serveral hours. I luckily found two solutions by changing code line by line: Use full URL to request the events (may not be decent, but it works) from client side: const sse = new EventSource('http://localhost:8080/events'); Set the server-side Cache Control Header to no-transform: 'Cache-Control': 'no-cache', --> 'Cache-Control': 'no-transform', or 'Cache-Control': 'no-cache', --> 'Cache-Control': 'no-cache, no-transform', I cannot fully understand why the no-transform directive matters…
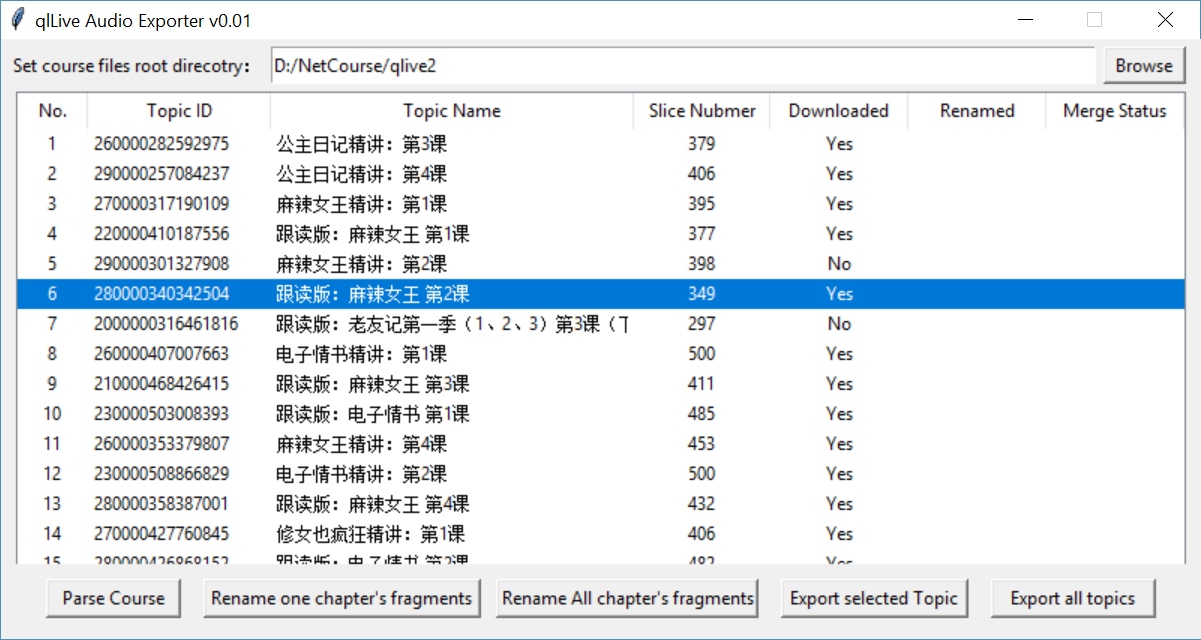
Build an audio fragments merger for qlive App courses, use python tkinter to create a window program.
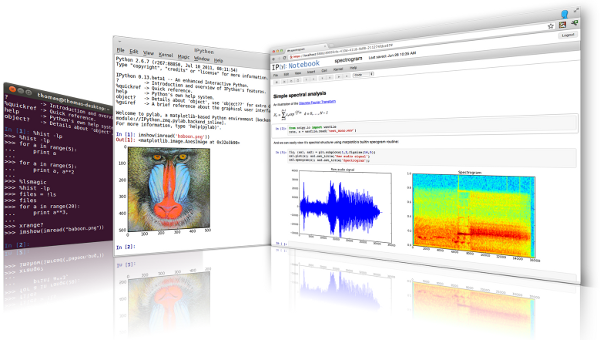
Win10+Python3.6 Install ipython and juypter(notebook) > python -m pip install --upgrade pip > pip install ipython jupyter Run ipython > ipython Run ipython with qt gui > pip install pyqt5 > ipython --gui=qt Run jupyter notebook > jupyter notebook then, create your notes in the web notebook in browser
01、为什么叫Shell? Command Interpreter,交互的命令解释器,它是相对于kernel的说法,是kernel的外壳程序,用来实现用户与kernel的命令行沟通:将用户的命令翻译给内核处理,同时将内核的处理结果反馈给用户。 系统登陆时取得的shell称之为login shell或primary shell。 在shell中所下达的命令,都是shell所fork出产生的子进程。 在shell中执行的脚本,则是另外由一个单独的非交互的sub-shell取执行,然后在由sub shell执行script中的各命令(也会产生相应的进程) Linux OS支持多种shell,具体在/etc/shells中可以看到,主要分为sh(如sh、bash)和csh(csh、tcsh、ksh)两大类。 02、Shell prompt(PS1)与Carrige Return(CR)的关系 PS1是用来告诉用户可以输入了,通常有两种形式: $:给普通用户使用 #:超级用户使用 CR由Enter回车键产生,是让用户告诉shell,我的命令输入完成,shell可以去解释和执行了。 命令行的定义:位于shell prompt和CR字符之间用户输入的文字。 一个标准的命令行由三部分组成,其中后面两个部分是可选的。 command-name options arguments 重要原理 Shell会根据IFS(Internal Field Separator)将命令行拆解为字段(word),然后再处理各字段中的特殊字符(meta),最后再重组命令行。 常见的IFS有:空格键、制表符、回车键等。 命令的名字可以来源于: Shell内建命令 $PATH之下的外部命令 命令别名 指定路径的其他外部命令或脚本 03、echo命令 echo的作用:将其argument送至标准输出。默认在显示完输入参数之后,再补充送出一个换行符(new-line character)。如要取消该换行符,采用echo -n arguments即可。 所以,直接输入一个不带任何选项和参数的echo命令,将输出一个空白行(就是new-line character)。 $echo $ 而输入echo -n相当于完成echo输入,再回车到另一行,echo执行将无任何输出。 $echo -n $ echo命令的三个选项: -e:启用对反斜杠转义字符的识别 -E:关闭反斜杠转义字符(默认为关闭) -n:取消行尾的换行符 所以echo常用来检查变量值 04、引用和meta处理(单引号、双引号、反斜杠) 4.1 Shell中的字符类型 命令行中的每一个字符,要么是literal character,要么是meta character。前者就是普通字符,后面是具有特别功能和意义的特殊字符(保留字符)。例如,IFS和CR都是meta。其他常用的meta还有: =:设置变量 $:用来对变量或运算进行替换 >:重定向stdout <:重定向stdin |:管道 &:重定向文件描述符,或将命令置于后台运行 ():将内部的命令置于nested-subshell中运行,或用于整数运算、命令替换。 {}:将内部的命令置于non-named function中运行,或用于变量替换的边界范围界定。 ;:执行前一个命令结束后,不判断返回值,继续执行分号后的下一个命令。 &&:判断前一个命令返回值是否为true,如实则继续执行下一命令。 ||:判断前一个命令返回值是否为false,如实则继续执行下一命令。 !:执行history中的命令。 其他…… 这些特殊字符由于具有特别的含义和功能,如不该出现的时候却使用了会导致命令出错或者达不到预期的效果。因此,在大部分情况下,我们根据需要会选择性的通过quoting来关闭这些meta。 escape:逃脱符。仅关闭其后紧接的单一meta。 soft quote:双引号。部分关闭内部的meta,如$、``和\这三种则不被关闭。 hard quote:单引号。全部关闭内部的meta字符。 空格键在单引号和双引号内均会被关闭 单引号、双引号在soft quote和hard quote中均被关闭 ENTER键在这三种引用内均被关闭,视为换行符,但是在命令重组阶段分别被视作换行符、空格符或无字符。 4.2 区分shell meta和command meta $awk {print $0} 1.txt #语法错误:{}在命令行中被视作命令块用,而括号中的命令又没加上;分号 $awk '{print $0}' 1.txt #OK:用''关闭所有大括号meta,使其成为awk的参数,避免在shell中处理 $awk "{print \$0}" 1.txt #OK:由于$在""未被关闭,所以需加用\来关闭 $awk \{print\ \$0\} 1.txt #OK:没有使用''和"",全部使用\来关闭shell meta $awk "{print $0}" 1.txt #语法不报错:""不能关闭$,所以$0还是shell变量,$0不能成为awk的Field Number。因为此处不是在执行脚本,所以$0也没有意义,被当作0处理,因此逐行打印0。 $awk "{print $1}" 1.txt #语法不报错:""不能关闭$,所以$0还是shell变量,$0不能成为awk的Field Number。因为此处不是在执行的脚本内部,所以$1也没有意义,被视为空值。 $awk "{print $10}" 1.txt #语法不报错:""不能关闭$,所以$0还是shell变量,$0不能成为awk的Field Number。因为此处不是在执行的脚本内部,所以$1也没有意义,被视为空值。因为位置参数最大是$9,又没有采用边界界定符,所有$10被视作$1和0,而$1被无视,所以等价于逐行打印0。 上述第一行,由于{}在shell中是用来将其中的命令组合起来成为一个命令块,那么{print $0}被视作为一命令块,其语法要求最后一个命令后面要用分号。所以上述写法会报语法错误! 上述第二行,用hard quote关闭了{}的命令块功能,同时也关闭了空格和\$0在shell中的meta作用,从而不被Shell作为Shell meta先解析,使得这几个meta成为命令awk自身的command meta($0是awk的field number,表示整行内容),而作为命令行参数的内容去解析。 使用第三行和第四行也同样达到取消{}、空格和$作为shell command的效果。其他: 发现在shell中任意命令(非执行script)末尾输入\$1-\$9,\$1-\$9会被无视、语法不报错。 在shell中任意命令(非执行script)末尾输入\$0,结果有所不同、语法不报错。 假设awk使用的$x的值从shell中获取进来,可采用变量替换来做(不要直接用hard quote,因为hard quote关闭了所有shell meta,无法直接进行变量替换),采用下述方法: $A=0 $awk "{print \$$A}" 1.txt $awk \{print\ \$$A\} 1.txt $awk '{print $'$A'}' 1.txt $awk '{print $'"$A"'}' 1.txt 05、变量与export 5.1. 定义变量(set,=) 设定变量采用 变量名=变量值 的格式,注意: =前后不能有IFS,=后面可以为null 变量名是 Case Sensitive(大小写敏感的) 变量名避免使用meta、$ 变量名第一个字符不能是数字 变量名长度限制在256个字符 首次set变量可以理解为定义变量并对其赋值 之后每次对变量名执行=,相当于对变量重新赋值 已经赋值的变量已存在,这对变量做进阶处理时${var}有影响 5.2. 替换变量(符号$) Shell强大的原因就是因为在命令行中其支持替换(变量替换、命令替换),变量替换的格式: $符号加上变量名,如$A,A必须已定义。 注意: 变量替换是指用变量的值来替换$变量名,将其再放置到command line之中; 不要用数学逻辑来套用变量设定,变量的值只看变量每次被set时=后面的值,与其他无动态关联关系,如: A=B B=C 这里,A的值不会变成C A=B B=$A A=C 这里,A的值最终为C,B是一个变量,值为C,也不会让B的值等于C 利用命令行的变量替换和区隔符号:可以append变量的值: A=B:C:D A=$A:E 而不能采用: A=BCD #A的值D A=$AE #此处,AE被视作一个变量,而不是先$A,再扩充E。若AE未定义,那么$AE为空,使得A为空值。 而应采用: A=BCD A=${A}E #使用{}限定变量名的范围,A变为BCDE 注:${}有很多用法 5.3. 设定环境变量(export) 环境变量即为全局起作用的变量,在shell上定义的变量均属于local variable,只有通过export输出之后才能成为环境变量,供后续其他命令使用。但是也仅仅是对当前Shell的session起作用。语法: A=B #先定义 export A #变量A不需要带$,或者直接 export A=B 例如,下面使用了$A,会进行变量替换 A=B B=C export $A #$A替换为B,那么等价于export B,是将变量B输出为环境变量 另外,直接使用export命令可以查看已经设定的环境变量 export export环境变量的生存期: 在shell中export的环境变量仅对当前shell的session起作用(写在内存中),shell退出后不再起作用 source(点命令)配置文件可以使得配置文件中的设定在当前shell中立即生效(当前不用重启) 如要使得变量任何时候对各session均有效的环境变量,需将其写入/etc/profile(全部用户)或者.bashrc(当前用户)等配置文件中(source或重启之后永久生效) 5.4. 取消变量(unset) 取消变量等价于删除变量,该变量将未定义、不存在。但以下在shell中输出均一样。 $ A= $ echo $A $ $ unset A $ echo $A # $ 但是null value的变量和unset的变量在变量的进阶处理${var}中有很大的区别,例如 $ str= #null value $ var=${str=expr} #变量str已set为null,str在此不再被set赋值,set不执行 $ echo $var $ $ echo $str…
command substitution, Bash Shell command process flow, soft quotation。命令替换、双引号引用,Bash命令行执行流程
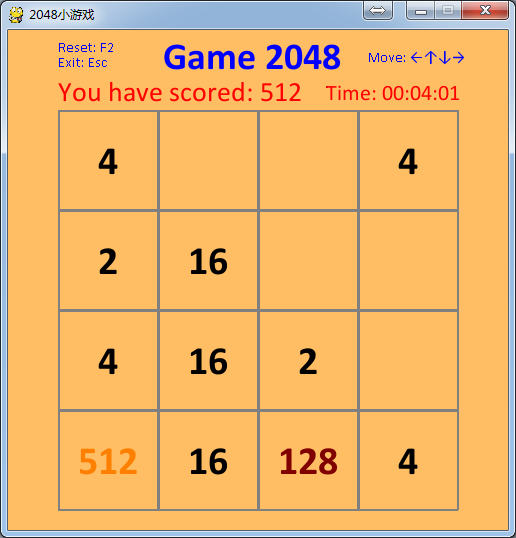
2048这个小游戏最初在微信上玩过,游戏规则简单,大致如下: 游戏面板为4*4共16格 初始化时随机产生一个数字2或4,将这个数字随机放到16格的一格之中 通过上、下、右、四个方向键朝一个方向移动面板中的数字使其靠拢或合并,这些数字: 每次操作不能交叉移动、只能在同行或同列根据按键方向做单方向平行移动 在移动的方向中,当每行/列中的数字存在相邻的重复项、或数字之前存在空格时,才可移动 在一次移动中:遇空格直接移入、最先相邻的2个相同的数字直接合并成一个新数字(并消除之前2个相同的数字),该行/列中后面其他数字再按该方向移动,直至该行/列数字间没有空格 在一次移动中:合并新生成的数字将不再与其他相同的数字合并消除 每按方向键一次,如有数字被移动(含合并消除),则随机在某个空格中产生一个数字2或4 已合并生成的最大的数字为当前游戏得分 当游戏面板中布满非0数字、且不可再合并时,格子中数据将无法移动,游戏结束 安装 python 3.6 安装第三方库 pygame Windows上在cmd中安装: Centos上在终端中安装: Ubuntu上在终端中安装: 用python编写游戏算法类,实现游戏数据操作:cls2048.py 用二维列表(4*4数组/矩阵)来操作游戏数据 将游戏面板中的空格单元在列表元素中的数据值设为0 每按键一次对应所有行/列的数据单方向移动 以单行和列移动为最小操作单元 如对应的数据在该按键方向上不能产生移动或数据合并,那么不随机产生新的数据 当有数据合并产生或者数据移动位置时,随机在空格处产生一个数据 向左移动或向右移动是对行数据操作、向上或向下移动是对列数据进行操作 向上移动等价于将二维列表先转置后的向左移动、然后再将数组转置还原的效果 向下移动等价于将二维列表先转置后的向右移动、然后再将数组转置还原的效果 在空格单元中随机生成2或4的数据:需要选择随机的位置和随机产生的值 当列表4*4全部非0值,且无相邻两个数值相同时,游戏结束 用pygame绘制游戏棋盘界面、控制按键操作、数据展示:pygame2048.py 初始化游戏棋盘,分为两个区域:标题游戏状态区(得分、计时),游戏棋盘区 利用捕获按键、操作游戏数据 显示游戏数据:画线用 ,写字用,渲染图形至界面用、刷新surface上新数据 Windows上在IDLE中打开pygame2048.py,按运行 或在cmd中执行: Linux中(该截图来自Ubuntu 14.04)在Terminl里执行: 说明:如想UI更好看,设计UI后用pygame针对背景色、字体、游戏格子等进行调整即可。 2048小游戏python代码

